In recent years, gluten-free baking has evolved from a niche dietary requirement to a mainstream culinary movement. With the global gluten-free product market projected to surpass $8.3 billion by 2025, the demand for accessible and delicious alternatives has never been higher. For individuals with celiac disease or gluten sensitivity, mastering gluten-free baking isn’t just a preference—it’s a necessity. But even for those exploring it by choice, the challenge lies in replicating the textures and flavors of traditional baked goods. Whether you’re new to this world or looking to refine your skills, understanding the nuances of gluten-free baking can transform your kitchen experiments into consistent successes.
What Are the Essential Ingredients for Gluten-Free Baking?
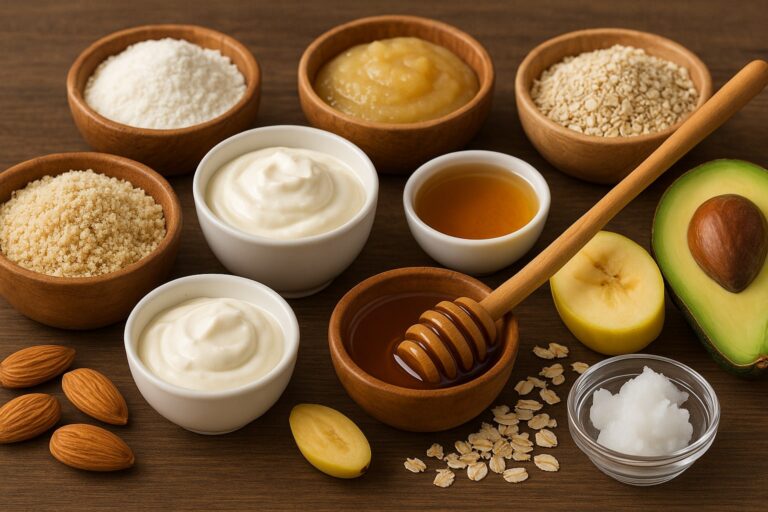
Gluten-free baking relies on a diverse palette of flours and binders to mimic the elasticity and structure that gluten provides. Almond flour, for instance, adds richness and moisture, while coconut flour absorbs liquid intensely, requiring careful hydration. Starches like tapioca or potato starch contribute lightness, making them ideal for airy cakes or crispy crusts. However, the real heroes of gluten-free baking are binding agents such as xanthan gum and psyllium husk. These ingredients act as molecular glue, preventing crumbly textures in breads and pastries.
Substitutions can be tricky—replacing wheat flour with a single gluten-free alternative often leads to disappointing results. A blend of flours and starches typically works best. For example, combining rice flour (for structure), sorghum flour (for tenderness), and tapioca starch (for chewiness) creates a balanced base. Experimentation is key, as each flour brings unique properties to the table. Remember, a cookie made solely with coconut flour will behave differently than one using almond flour, so adjust liquid ratios accordingly.
Why Is Precision Measurement Critical in Gluten-Free Recipes?
Gluten-free baking is a science where precision matters. Unlike traditional baking, which forgives slight measurement variations, gluten-free recipes demand accuracy. A few extra grams of starch or a scant teaspoon of binder can alter texture dramatically. This is why many bakers advocate using a kitchen scale for precision measurement. Weight-based measurements eliminate inconsistencies caused by packing flour into cups, ensuring repeatable results.
Texture enhancement also hinges on proper measuring. Too much flour can lead to dryness, while too little may result in a gummy consistency. For instance, if a recipe calls for 120 grams of almond flour, scooping directly from the bag with a scale ensures you don’t accidentally compress the flour, which adds unintended density. This attention to detail is especially crucial in delicate recipes like macarons or soufflés, where airiness is paramount.
How Can You Achieve the Perfect Texture Without Gluten?
Gluten’s role in creating structure and elasticity is irreplaceable, but creative techniques can bridge the gap. Incorporating eggs, for example, provides proteins that help trap air bubbles, giving cakes and muffins a tender crumb. Carbonated liquids like sparkling water or whipped aquafaba (chickpea brine) introduce lightness into batters, mimicking the rise gluten offers. A study on gluten-free cookies found that recipes using sorghum flour paired with carbonated water achieved a 20% better rise compared to those relying solely on baking powder.
Hydration is another critical factor. Gluten-free flours often absorb moisture differently, leading to dry or dense results if not balanced. Letting batters rest for 10–15 minutes before baking allows flours to fully hydrate, improving texture. For breads, adding a tablespoon of vinegar or yogurt can enhance elasticity by interacting with starches. These small adjustments make a world of difference, turning potential kitchen disasters into crowd-pleasing treats.
Gluten-Free Flour Blends: Homemade vs. Store-Bought
Pre-made gluten-free flour blends offer convenience, but homemade mixes allow customization. Commercial blends often include stabilizers and gums, which can simplify recipes but may not suit all dietary needs. Crafting your own blend lets you control the ratio of protein-rich flours (like buckwheat) to light starches (such as arrowroot). A common starting point is a 70% flour to 30% starch ratio—for example, 40% brown rice flour, 30% sorghum flour, and 30% tapioca starch.
When substituting regular flour with a gluten-free variant, a 1:1 swap isn’t always effective. Store-bought 1:1 blends are formulated to mimic all-purpose flour, but homemade versions may require additional binders. For every cup of gluten-free flour, consider adding 1⁄2 teaspoon of xanthan gum unless the recipe already includes it. Testing small batches helps identify the ideal blend for your favorite recipes, whether you’re baking crusty bread or fudgy brownines.
Mastering Leavening Agents and Rising Times
Leavening agents like baking powder and yeast behave differently in gluten-free environments. Without gluten to trap gas bubbles, doughs may rise rapidly but collapse during baking. To counter this, increase rising times slightly. For yeast-based recipes, let dough proof until it’s just shy of doubling in size—overproofing can lead to a sunken center. An extra egg or tablespoon of psyllium husk can stabilize the structure, as seen in many gluten-free bread recipes.
Baking soda, which requires acidity to activate, pairs well with ingredients like buttermilk or lemon juice. In muffins or quick breads, combining baking soda with an acidic component ensures a robust rise. However, gluten-free batters are often heavier, so don’t expect the same dramatic lift as wheat-based versions. Patience and precise timing are your allies here.
Balancing Moisture Content for Delicate Results
Gluten-free baked goods are notorious for drying out quickly. Ingredients like applesauce, mashed bananas, or Greek yogurt can boost moisture retention without making batters soggy. For example, adding 1⁄4 cup of applesauce to a cake recipe replaces some of the fat while keeping crumbs tender. Covering bread with foil during the last 10 minutes of baking also prevents excessive crust hardening.
Another trick is brushing finished goods with simple syrup or milk (dairy or plant-based) while they’re still warm. This adds a subtle sheen and locks in moisture. For cookies, slightly underbaking them ensures a chewy center. If your creation turns out crumbly, don’t despair—crumbled gluten-free brownies make an excellent topping for ice cream or parfaits.
How Does Oven Temperature Affect Gluten-Free Baking?
Oven calibration is crucial. Gluten-free batters and doughs are less forgiving of temperature fluctuations. Convection ovens, which circulate heat evenly, can promote uniform browning but may dry out goods faster. Reduce convection temperatures by 25°F and monitor baking times closely. In conventional ovens, rotating pans halfway through ensures even heat distribution, preventing lopsided cakes or burnt edges.
Experimentation is key. For instance, lowering the temperature by 10–15°F and extending baking time can prevent the exterior from hardening before the interior cooks through. Use an oven thermometer to verify accuracy, as many home ovens run hot or cold. A perfectly baked gluten-free loaf should sound hollow when tapped and have an internal temperature of 205–210°F.
Enhancing Flavors in Gluten-Free Recipes
Gluten-free flours can impart earthy or nutty flavors, which may overshadow delicate tastes. Combat this by boosting the flavor profile with spices like cinnamon or cardamom, citrus zests, or extracts such as almond or vanilla. Toasted nuts, chocolate chips, or dried fruit add layers of texture and taste. For example, a teaspoon of espresso powder deepens the chocolate notes in brownies, while a dash of nutmeg elevates pumpkin bread.
Don’t shy away from umami-rich ingredients either. A pinch of salt enhances sweetness, and a tablespoon of miso paste in cookie dough creates a complex, savory undertone. Since gluten-free baking often requires more fat to improve mouthfeel, browned butter or coconut oil can introduce richness that masks any chalkiness from starches.
Storing Gluten-Free Baked Goods for Freshness
Gluten-free items tend to stale faster due to the lack of gluten’s moisture-retaining properties. Store breads and cakes in airtight containers at room temperature for up to two days, then freeze for longer shelf life. Cookies can be layered between parchment paper in sealed jars. Revive day-old muffins by microwaving them for 10 seconds with a damp paper towel.
For optimal storage solutions, portion doughs before freezing. Pre-scooped cookie dough balls or pre-cut pastry sheets thaw quickly and bake fresh on demand. Vacuum-sealing extends freezer life to several months, making it easier to enjoy homemade treats without daily baking.
Nutritional Considerations: Beyond Gluten-Free Labels
While gluten-free products are essential for some, they aren’t inherently healthier. Many commercial options are high in refined sugars and saturated fats. Prioritize whole-grain gluten-free flours like oat, quinoa, or amaranth for fiber and protein. Almond and coconut flours offer healthy fats, but portion control is vital due to their calorie density.
Incorporate nutrient-dense add-ins like chia seeds, flaxmeal, or pureed vegetables. For example, adding zucchini to bread or black beans to brownies boosts fiber and vitamins without compromising taste. Balance indulgence with nourishment by tweaking recipes—swap half the sugar with mashed dates or use unsweetened applesauce to reduce oil content.
Adapting Traditional Recipes to Gluten-Free Versions
Converting a family-favorite recipe starts with understanding its core structure. Identify the role of gluten—is it providing chewiness, elasticity, or rise? Replace wheat flour with a blend that matches those needs. For pie crusts, a mix of rice flour and tapioca starch yields flakiness, while bread flour substitutes benefit from added psyllium husk.
Test in small batches and adjust liquids or binders as needed. If a cake sinks, try increasing the baking powder by 1⁄4 teaspoon or adding an egg white. Document changes meticulously—gluten-free baking is as much about iteration as inspiration. Over time, you’ll develop a intuition for which swaps work best in different scenarios.
Cost-Effective Strategies for Gluten-Free Bakers
Gluten-free ingredients can be pricey, but smart shopping cuts costs. Buy flours and starches in bulk from online retailers or specialty stores. Consider sharing large orders with friends or joining a baking co-op. Homemade blends are often cheaper than pre-mixed options—invest in reusable containers to store them.
Reduce waste by repurposing leftovers. Stale bread becomes croutons or breadcrumbs, and overripe bananas transform into muffin batter. Plan baking sessions around seasonal produce, like pumpkin puree in fall or zucchini in summer, to capitalize on affordability and flavor.
Conclusion: Embrace the Art of Gluten-Free Baking
Gluten-free baking is a journey of creativity and precision. By mastering ingredient ratios, leavening techniques, and flavor enhancements, you can turn dietary restrictions into culinary opportunities. Remember, every mishap is a step toward perfection. Start with a simple recipe, like banana bread or chocolate chip cookies, and gradually tackle more complex projects. Share your creations, swap tips with fellow bakers, and most importantly, savor the process. Ready to preheat the oven? Your next gluten-free masterpiece awaits!